August 6, 2026 · Bella Staging
Virtual Staging Photo Requirements: How to Capture Images That Deliver the Best Results
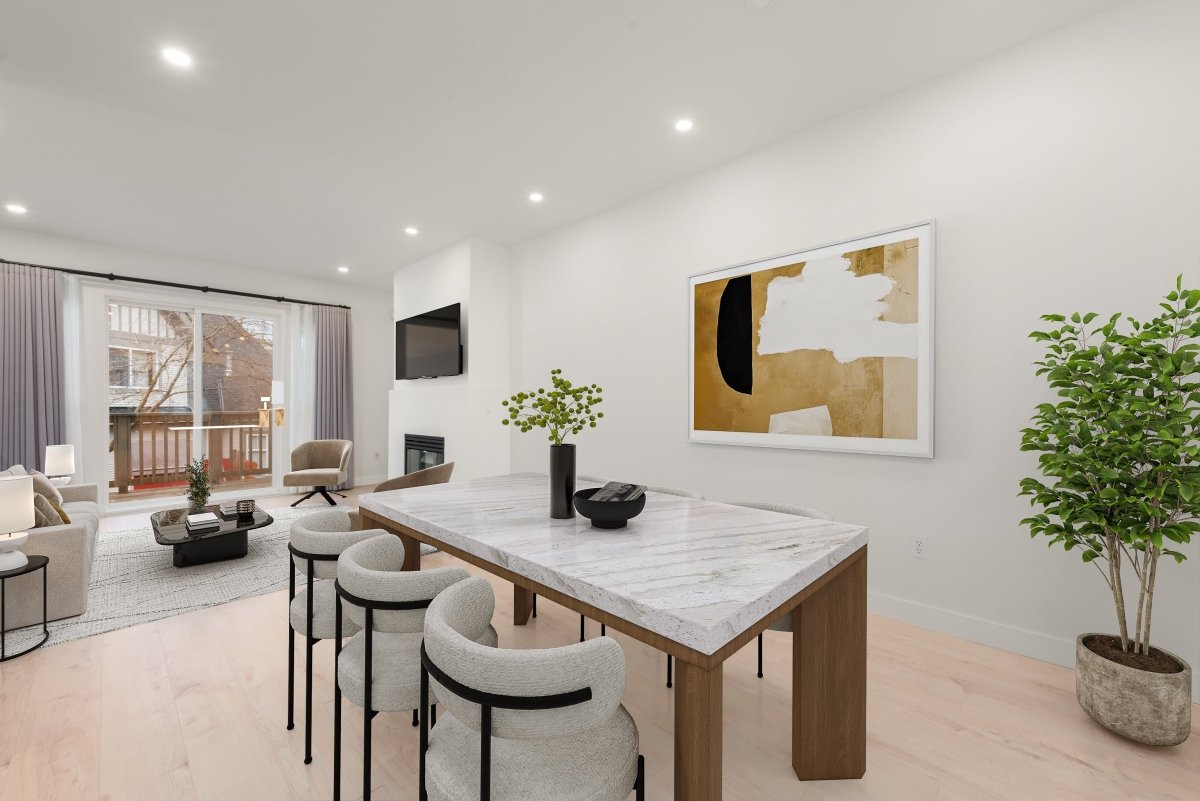
Virtual staging can transform a vacant property photo into a warm, inviting, and market-ready image. However, the quality of the final result depends heavily on the original photo provided.
At Bella Virtual Staging, we follow specific photo requirements to ensure that every staged image looks realistic, professional, and suitable for real estate marketing.
Therefore, before submitting photos for our professional virtual staging service, use this standard operating procedure to determine whether your images are ready for staging.
Why Photo Quality Matters for Virtual Staging
Virtual staging works best when the original property photo clearly shows the room’s structure, lighting, flooring, walls, windows, and available space.
A clean, well-composed image allows our designers to:
- Position furniture accurately
- Maintain realistic proportions
- Match the perspective of the room
- Create natural-looking shadows and lighting
- Preserve important architectural details
- Produce professional real estate listing images
On the other hand, dark, blurry, distorted, or heavily obstructed photos may limit the quality and realism of the finished result.
If your property photos need lighting, color, or detail improvements before staging, you may also consider Bella Virtual Staging’s HDR photo-editing service.
Bella Virtual Staging Photo Submission SOP
Before uploading an image, review each of the following requirements.
1. Submit High-Resolution Photos
Always provide the highest-resolution version of the photo available.
A high-resolution image contains more detail, which helps furniture, décor, textures, and room features appear clear and realistic. Additionally, high-quality files are better suited for real estate listing websites, social media, brochures, and other marketing materials.
Avoid submitting:
- Screenshots
- Social media downloads
- Compressed messaging-app images
- Small thumbnail files
- Photos that have been repeatedly downloaded or edited
Whenever possible, upload the original image directly from the camera, phone, photographer, or property media folder.
2. Use Landscape Orientation
Landscape or horizontal photos generally work best for virtual staging.
This orientation shows more of the room and provides enough space for realistic furniture placement. Moreover, landscape images are commonly used on real estate listing platforms and property marketing websites.
Portrait photos may still be accepted in certain situations. However, they often provide a narrower view and may reduce the available staging area.
3. Photograph the Room From a Corner or Doorway
Take the photo from a position that shows as much of the room as possible.
For example, standing near a doorway or room corner can provide a wider and more natural view. The image should clearly show the floor area, walls, windows, doors, and other permanent features.
The best angle usually includes:
- Two or three visible walls
- A clear view of the floor
- Visible room depth
- Important architectural details
- Enough vacant space for furniture
Avoid taking the photo while standing too close to a wall, window, or doorway.
4. Keep the Camera Straight and Level
Hold the camera straight when taking the photo.
Vertical lines, such as walls, doors, windows, and cabinets, should appear upright rather than leaning inward or outward. A level camera creates a more professional image and makes it easier to place virtual furniture using the correct perspective.
Additionally, avoid tilting the camera too far upward or downward. The image should feel natural, as though a potential buyer is standing inside the room.
5. Use Natural and Balanced Lighting
Bright, evenly lit rooms produce the best virtual staging results.
Whenever possible, photograph the property during the daytime. Open curtains or blinds to allow natural light into the room. You may also turn on interior lights to brighten darker areas.
However, avoid overly bright windows or direct sunlight that creates harsh shadows across the floor and walls.
The room should not appear:
- Extremely dark
- Overexposed
- Yellow or heavily tinted
- Washed out
- Covered by strong shadows
Balanced lighting helps virtual furniture blend naturally with the existing room.
Photos with lighting or exposure problems may benefit from Bella’s professional real estate photo-editing services.
6. Submit Photos of Vacant or Mostly Vacant Rooms
Vacant rooms are ideal for virtual staging because they provide a clean foundation for furniture and décor placement.
Before photographing the room, remove as many movable items as possible, including:
- Boxes
- Cleaning supplies
- Trash bins
- Personal belongings
- Small tables
- Loose chairs
- Floor coverings
- Temporary decorations
- Construction materials
If the room contains furniture that needs to be removed digitally, clearly mention this requirement when submitting the order.
Bella also provides furniture removal and virtual staging services for property photos that are not completely vacant.
7. Clean and Prepare the Room
The property should be clean and presentable before photography.
Virtual staging adds furniture and décor, but it does not automatically correct every maintenance or cleanliness issue. Therefore, clean the floors, windows, countertops, walls, and other visible surfaces before taking the photo.
Additionally, remove distracting items such as:
- Exposed wires
- Stickers
- Cleaning tools
- Personal photographs
- Open cabinet doors
- Hanging clothes
- Pet items
- Bathroom products
- Unnecessary signs
A clean original image creates a cleaner and more professional final result.
8. Show Enough Floor Space
The floor is one of the most important areas in a virtual staging photo.
Our designers use the visible floor space to determine the correct furniture size, placement, angle, and perspective. Therefore, the image should not crop out most of the floor.
Avoid photos that show too much ceiling and very little floor. Instead, position the camera so the image presents a balanced view of the entire room.
9. Avoid Extreme Wide-Angle Distortion
A wide-angle lens can help show more of the room. However, an extremely wide lens may stretch walls, floors, windows, and room corners.
This distortion can make the room appear unnaturally large and may affect furniture proportions. Therefore, use a moderate wide-angle setting whenever possible.
The goal is to show the room clearly without creating a misleading representation of its actual size.
10. Do Not Use Zoomed-In or Heavily Cropped Photos
Submit the complete room photo rather than a heavily cropped version.
Zoomed-in images may remove important information about the room’s dimensions and layout. Similarly, close-up images of a single wall, window, fireplace, or cabinet may not provide enough space for virtual staging.
The image should show the room as a complete environment.
11. Avoid Blurry or Grainy Images
Check each photo for sharpness before submitting it.
Blurry images may result from camera movement, low lighting, digital zoom, or an incorrect focus point. Meanwhile, grainy images commonly occur when photos are taken in dark rooms.
To improve image clarity:
- Clean the camera lens
- Use both hands to hold the device
- Stand still while taking the photo
- Tap the screen to focus
- Increase the room’s lighting
- Avoid digital zoom
- Use a tripod when available
If flooring details, door frames, window edges, and other property features appear unclear, consider retaking the image.
12. Avoid Reflections of People or Equipment
Check mirrors, windows, glass doors, appliances, and other reflective surfaces before taking the photo.
The photographer, camera, tripod, or other people should not appear in the reflection. These distractions may require additional editing and can reduce the professional appearance of the image.
Move to a different position or angle until the reflection is no longer visible.
13. Do Not Cover Important Room Features
Permanent property features should remain visible.
For example, avoid blocking:
- Fireplaces
- Built-in shelving
- Large windows
- Kitchen islands
- Cabinetry
- Feature walls
- Balcony access
- Sliding doors
- Architectural details
These features may influence how the furniture is arranged. Additionally, they are often important selling points that should remain visible in the completed image.
14. Submit One Clear Image Per Room Angle
You may submit multiple angles of the same room. However, each image should be treated as a separate staging photo.
When submitting multiple angles, clearly label each file. For example:
- Living Room – Angle 1
- Living Room – Angle 2
- Primary Bedroom – Window View
- Primary Bedroom – Doorway View
Clear file names reduce confusion and help ensure that each image receives the correct staging instructions.
15. Provide the Correct Room Type
Always identify the room shown in each image.
For example, specify whether the image is a:
- Living room
- Dining room
- Bedroom
- Home office
- Family room
- Kitchen
- Outdoor living area
- Studio apartment
- Basement
- Game room
This information helps our designers select appropriate furniture and create a layout that matches the room’s intended function.
16. Include Your Preferred Interior Design Style
Include your preferred interior design style when submitting the order.
Bella Virtual Staging can create a range of professional looks depending on the property, location, and target buyer. Examples may include:
- Modern
- Contemporary
- Minimalist
- Scandinavian
- Traditional
- Transitional
- Coastal
- Luxury
- Farmhouse
- Industrial
You may also provide reference images to communicate your preferred furniture style, color palette, or overall atmosphere.
Explore Bella Virtual Staging’s virtual staging service to learn more about the available staging options.
17. Keep Instructions Clear and Specific
Provide clear directions for every image.
For example:
“Stage this vacant room as a modern living room using neutral furniture. Keep the fireplace, windows, and main walkway visible.”
Clear instructions help reduce unnecessary revisions and allow the designer to understand your desired outcome from the beginning.
Include relevant details such as:
- Room type
- Preferred interior style
- Preferred colors
- Target buyer or renter
- Furniture placement requests
- Features that must remain visible
- Objects that need to be removed
- Special property characteristics
Recommended Photo Specifications
For the best results, submit images that follow these general specifications:
- File format: JPG, JPEG, or PNG
- Orientation: Landscape preferred
- Resolution: Highest available resolution
- Lighting: Bright and evenly balanced
- Room condition: Vacant or mostly vacant
- Camera position: Straight, level, and wide enough to show the room
- Image quality: Clear, sharp, and free from heavy compression
- File name: Clearly labeled by room and angle
Photos That May Require Additional Editing
Some photos may still be usable but could require additional preparation or editing.
Examples include images containing:
- Existing furniture
- Clutter or personal belongings
- Wall damage
- Floor damage
- Construction materials
- Strong reflections
- Television screens
- Visible people
- Pets
- Exposed wiring
- Dark areas
- Overexposed windows
- Seasonal decorations
When submitting these photos, explain what should be removed, corrected, or retained.
For additional image preparation options, review Bella Virtual Staging’s complete range of real estate visual marketing services.
Photos That May Not Be Suitable for Virtual Staging
In some cases, retaking the photo may be the best option.
A photo may not be suitable when it is:
- Extremely blurry
- Very low resolution
- Almost completely dark
- Severely overexposed
- Heavily cropped
- Blocked by large objects
- Taken from an unusable angle
- Distorted beyond correction
- Missing most of the floor area
- Downloaded as a small online thumbnail
Retaking the image can significantly improve the final staging result and produce stronger marketing materials.
Quick Photo Submission Checklist
Before sending your images to Bella Virtual Staging, confirm the following:
- The image is the original high-resolution file.
- The room is vacant or mostly vacant.
- The room is clean and free from clutter.
- The photo is bright and evenly lit.
- The camera is straight and level.
- The image shows enough floor space.
- The room is photographed from a wide, natural angle.
- Important property features are visible.
- The image is not blurry or heavily compressed.
- The file is clearly labeled.
- The room type is identified.
- Design preferences and editing instructions are included.
For answers about image submissions, pricing, revisions, and other service details, visit the Bella Virtual Staging FAQ page.
Bella Virtual Staging Submission Workflow
Once your photos are ready, follow this process.
Step 1: Select the Best Images
Review all available property photos and choose the clearest, brightest, and most complete angles.
Step 2: Label Each File
Rename every image according to the room and angle.
Examples:
- Living-Room-Angle-1.jpg
- Dining-Room-Angle-1.jpg
- Primary-Bedroom-Angle-1.jpg
- Home-Office-Angle-1.jpg
Step 3: Prepare Your Instructions
Create a short staging instruction for each image. Include the room type, desired style, preferred colors, and any object-removal requests.
Step 4: Upload the Original Files
Upload the original high-resolution images rather than screenshots or compressed copies.
Step 5: Review the Completed Images
After receiving the completed virtual staging images, review the furniture placement, style, proportions, architectural details, and overall presentation.
Bella Virtual Staging provides a standard turnaround time of 24 hours, helping real estate professionals prepare polished, market-ready property images efficiently.
Frequently Asked Questions
Can I submit photos taken with a smartphone?
Yes. Modern smartphones can produce suitable real estate photos when the camera lens is clean and the room is photographed with sufficient lighting. However, always submit the original file rather than a screenshot or compressed copy.
Can Bella stage a room that already contains furniture?
Yes. However, furniture removal may be required before new virtual furniture can be added. Review Bella’s furniture removal and staging options for more information.
Should I edit the photo before submitting it?
Minor brightness and color adjustments may be acceptable. However, avoid heavy filters, artificial blurring, excessive sharpening, or significant alterations that change the room’s natural appearance.
How many photos should I submit?
Submit the strongest angles that help buyers understand the room and property layout. Each staged angle is generally treated as a separate image.
What should I do when I am unsure whether a photo is suitable?
Review the Bella Virtual Staging frequently asked questions or contact the Bella team before placing your order.
Final Thoughts
The best virtual staging results begin with the right property photos.
High-resolution, well-lit, level, and properly composed images allow virtual furniture and décor to be added naturally while preserving the room’s true architectural features.
Therefore, take time to prepare each room, choose the strongest camera angle, and submit clear instructions. By following Bella Virtual Staging’s photo requirements and standard operating procedure, you can achieve realistic, professional images that help vacant properties feel more inviting to prospective buyers and renters.
Ready to Transform Your Vacant Property Photos?
Submit your high-resolution room photos through Bella Virtual Staging’s professional virtual staging service.
Include the room type, preferred interior style, and any special instructions for each image. Our team will transform your vacant property photos into polished, market-ready images with a standard turnaround time of 24 hours.