September 23, 2026 · Zoe Jovic
How to Take Real Estate Photos: 2026 Tips (Including iPhone)
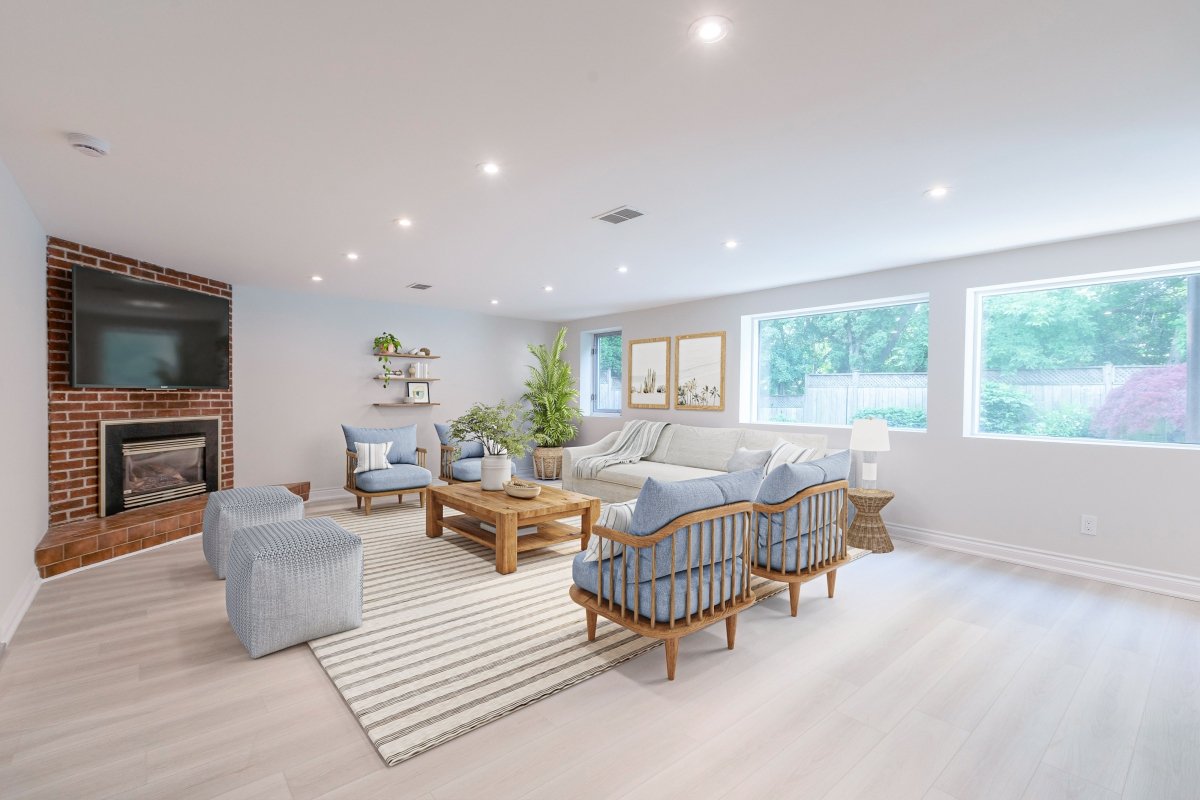
How do you take real estate photos that sell? Prepare the home first: declutter, clean, open every blind and turn on all the lights. Then shoot on a tripod from the room's corners at about chest height with a wide angle lens, keep vertical lines straight, and bracket your exposures so bright windows and darker interiors both keep their detail. Edit lightly for accurate color, shoot exteriors in soft light or at golden hour, work from a shot list so no room is missed, and disclose anything you digitally change. This guide walks through each step, including how to do it all on an iPhone.
Real estate photography matters because the photos are the first showing. In NAR's 2025 Profile of Home Buyers and Sellers, 46% of buyers said their first step was looking at properties online, and 81% of buyers who searched online rated photos as very useful, ahead of every other website feature. Listing photos decide whether a buyer books a tour or keeps scrolling.
Key takeaways
These real estate photography tips apply whether you shoot with a full-frame camera or the phone in your pocket.
- Light and preparation matter more than the camera. A clean, bright room photographed carefully beats an expensive camera in a cluttered one.
- Use a tripod, shoot from corners at chest height, and keep vertical lines vertical.
- Bracket exposures (or use HDR) so windows and shadows both hold detail.
- Edit for accuracy: straighten, fix white balance, and avoid over editing that misrepresents the home.
- A recent iPhone takes good listing photos if you control light, height and lens choice.
- Virtual staging turns vacant rooms into furnished photos, but staged or altered images must be disclosed.
Why do real estate photos matter so much?
Buyers judge a home online long before they walk through it. Sellers know it too: in NAR's 2025 Profile of Home Staging, 88% of sellers' agents said having photos available was more important or much more important to their clients, compared with 47% for video and 43% for physical staging.
Poor lighting, crooked walls and cluttered counters can make a home look worse than it is, and that impression costs buyer interest before the first showing. Strong real estate photography also works far beyond the MLS. The same images feed your social posts, flyers, email campaigns and other marketing materials, so good listing photos are one of the few assets you pay for once and use everywhere.


How do you prepare a home for a real estate photo shoot?
Most problems in real estate photos are solved before the camera comes out, and photographing real estate goes much faster when the seller has done the prep. Walk the property the day before and work through this list with the seller:
- Declutter every surface. Clear kitchen counters, fridge doors, vanities and nightstands. Remove personal photos, pet bowls, cords and bins.
- Clean what the camera magnifies: windows, mirrors, stainless steel appliances and floors.
- Turn on all the lights, including lamps, under-cabinet lights and range hoods, and replace dead or mismatched bulbs so the color stays consistent from room to room.
- Open blinds and window treatments to bring in natural light. Close toilet lids, straighten towels and make beds tightly.
- Prep the exterior for curb appeal: move cars and trash cans, mow, sweep the walkway, and tidy outdoor spaces like patios and decks.
Create a shot list
A shot list keeps the photo shoot quick and makes sure nothing is missed: the front exterior, the back of the house, every main room from its best angle, the kitchen from two directions, the primary bedroom and bath, and the standout features that justify the listing price, such as a fireplace, built-ins, views or architectural details. Photographing the same room from three nearly identical spots adds nothing. One frame per angle that tells the buyer something new does. Skip panoramic images for the MLS gallery, since they bend walls; save 360° captures for virtual tours.
What camera gear do you need for real estate photography?
You can start with a phone, but a professional real estate photographer typically brings:
- A camera that shoots RAW files, so highlights and shadows can be recovered in post processing.
- A wide angle lens (roughly 16 to 24 mm on a full-frame camera) for interiors. Ultra wide lenses make small rooms readable, but going wider than you need stretches furniture and door frames.
- A tilt shift lens, if the budget allows. It corrects converging vertical lines in camera, which is why architectural and luxury photographers rely on one.
- A 24 to 70 mm zoom for exterior photos and close up shots of finishes. A macro lens is rarely needed.
- A sturdy tripod and a level, which keep multiple exposures aligned and lines straight.
- A flash for balancing dark rooms, and a drone for aerials of a large property or a lot worth showing.
Drone photography for a listing is commercial flying, so in the U.S. the pilot needs an FAA remote pilot certificate under Part 107.
What are the best camera settings for real estate photos?
There is no single recipe, but most interior photography starts from the same camera settings:
- Shoot RAW (or ProRAW on an iPhone) for the most room to correct color balance and exposure later.
- Keep ISO low, around 100 to 400, and let the tripod handle slower shutter speeds.
- Use an aperture around f/7.1 to f/11 so the whole room is sharp from front to back.
- Bracket three to five exposures per angle and blend them. That high dynamic range keeps the view through the window and the detail in the shadows.
- Set white balance deliberately. Mixed daylight and warm bulbs are the most common cause of yellow walls.
- Turn on the grid and level so vertical edges and wall edges stay straight.


How do you take interior real estate photos?
Shoot from corners at chest height
Stand in a corner or doorway and shoot toward the opposite corner so the room shows depth and flow. A camera height around chest level, roughly four to five feet, keeps furniture and floor in natural proportion. Shooting from full standing height looks down on the room, and very low angles make ceilings loom.
Keep vertical lines straight
Hold the camera level instead of tilting it up. Tilting makes door frames and wall edges lean inward, which buyers read as sloppy even if they can't say why. Fix small errors afterward with the upright or vertical correction in your editing software.
Balance natural light and interior lighting
Combine daylight with the room's own lights. Avoid harsh direct sun through the windows, which creates harsh shadows and blown-out floors; shoot those rooms later in the day or soften the light with sheer curtains. In low light, use a longer exposure on the tripod or bounce a flash off the ceiling rather than aiming it at the wall.
Room-by-room tips
- Kitchen: clear counters, one or two styled items, and a second angle from the dining area to show how the spaces connect.
- Living room: show the way in and the connection to the dining area or kitchen.
- Bedrooms: shoot from the doorway corner with the whole bed in frame.
- Bathrooms: a straight-on angle often works better than a corner. Check the mirror so you are not in it.
- Laundry and powder rooms: one clean frame is enough.
How do you take exterior real estate photos?
Exterior real estate photos set the first impression, and the front of the house is the lead image on most listings, so it has to earn buyer attention as a small thumbnail in search results.
- Light: an overcast day gives soft, even light without harsh shadows, while golden hour adds warmth when the sun is on the front of the house. Check which way the home faces before you book.
- Skies: cloudy skies can be replaced in editing, but a replaced sky is a digital alteration, so see the disclosure section below.
- Twilight photography: dusk shots with the interior lights glowing stand out in search results. A photographer returning at sunset costs extra; a day-to-dusk edit of a daytime frame is the budget option.
- Angles: shoot the front straight on and at 45 degrees, then the backyard, the outdoor spaces, and whatever sells the lot, such as a pool, a view or the size of the yard. Drone shots help with acreage and neighborhood context.


How do you take real estate photos with an iPhone?
A recent iPhone is capable of good listing photos, and it is the camera many agents already carry. The iPhone 17 Pro, for example, has three 48 MP rear cameras, including a 13 mm ultra wide with a 120° field of view and built-in lens correction, and it shoots Apple ProRAW. The camera isn't the limit. Technique is, and the same real estate photography tips apply when photographing real estate on a phone.
iPhone camera settings that matter
- Turn on Grid and Level in Settings > Camera to keep verticals straight.
- Use 0.5x for small rooms and 1x for larger rooms and exteriors. Step back rather than going wider when you can; the ultra wide stretches anything near the edges of the frame.
- Hold the phone at chest height and level, or better, use a small tripod with the self-timer or a Bluetooth shutter.
- Tap to focus, then press and hold to lock exposure, and drag the brightness slider down slightly so windows don't blow out.
- Let Smart HDR handle mixed light. In dark rooms, Night mode on a tripod gives cleaner results than brightening later.
- Shoot ProRAW on models that support it for photos you plan to edit, and turn off flash and Live Photos.
Where an iPhone falls short
A phone struggles with very bright windows beside dark interiors, big rooms that need long exposures, and tall spaces where verticals converge. For a luxury listing or a competitive market, a professional photographer with a tilt shift lens and flash will still deliver cleaner files. For a rental, a quick social post or photos you plan to virtually stage, a phone works well. Our guide to taking photos for virtual staging that actually look real covers the angles designers need.
How should you edit real estate photos?
Editing should make photos accurate and consistent, not different. A quick pass in editing software such as Adobe Lightroom (desktop or mobile) or Snapseed covers most of it:
- Straighten vertical edges and crop every image to the same aspect ratio, usually 3:2 or 4:3, so the gallery looks uniform.
- Correct white balance so walls show their real color.
- Lift shadows and recover highlights, especially around windows.
- Remove small distractions such as a cord or a smudge.
- Keep saturation natural. Over editing, with neon lawns and cartoon skies, erodes trust the moment a buyer walks in.
When should you outsource editing?
If you are a real estate agent who shoots your own listings, editing is where the hours go. Outsource the edits that need skill: day-to-dusk conversions, object and furniture removal, and window pulls. Bella's real estate photo editing covers day-to-dusk for $5 a photo and furniture removal for $15, with a standard 24-hour turnaround.
Disclose digital alterations
Edits that change what the property looks like, such as virtual staging, removed furniture, a replaced sky or greener grass, need a disclosure. Most MLSs set their own rules, and in California AB 723 has required, since January 1, 2026, a statement on or next to any digitally altered listing image plus access to the original, unaltered photo. Routine adjustments like exposure, white balance, straightening and cropping don't count as alterations under that law.


How many photos should a real estate listing have?
Enough to show every room once and the best rooms twice. Photographer packages are a useful guide: PhotoFounder's 2026 pricing guide sizes typical packages by square footage: 15 to 25 photos for homes under 2,000 square feet, 25 to 40 for 2,000 to 4,000 square feet, and 40 to 60 above that. Multiple images of one room only help when each shows something new. Check your MLS upload limit, lead with the strongest exterior or main living space, and order the rest like a walk-through.
Should you hire a professional real estate photographer?
For most listings, yes. It is one of the cheapest line items in the sale. PropPhoto's August 2026 data, drawn from 684 packages published by 333 photographers, puts a standard package at $200, with most between $150 and $300. Drone, video and floor plans cost extra.
For a real estate agent, shooting it yourself makes sense for rentals, pre-listing previews, "coming soon" posts and quick updates. Many agents do both: a professional for the MLS set, and phone photos for stories and social.
How does virtual staging fit into real estate photography?
Vacant properties photograph as empty boxes. Scale is hard to judge, and they are easy to scroll past. NAR's 2025 Profile of Home Staging found that 83% of buyers' agents say staging makes it easier for buyers to picture a home as their own, and the rooms that matter most are the living room (37%), the primary bedroom (34%) and the kitchen (23%).
Virtual staging adds furniture to the photos you already have. Bella's virtual staging costs $37 per photo, with volume discounts from three photos, and every image is composed by an interior designer and delivered in 24 to 48 hours. Photograph empty rooms exactly as you would furnished ones: level, from the corner, with the lights on. Then label every virtually staged photo.


What are common mistakes in real estate photos?
- Poor lighting: lights off, dark corners, or blown-out windows.
- Leaning verticals from tilting the camera up.
- Going too wide, so rooms look bigger online than in person and disappoint at the showing.
- Clutter and personal items left in frame.
- The photographer's reflection in a mirror, window or oven door.
- Missing rooms, which make buyers assume the worst.
- Over editing, including oversaturated colors and fake-looking skies.
- Vertical photos on portals that display horizontal frames.
Frequently asked questions
How do you take good real estate photography?
Prepare the home, shoot in soft light with every light on, use a tripod at chest height, keep verticals straight, bracket exposures, and edit for accuracy. Follow a shot list so every room and the exterior are covered.
What is the 20-60-20 rule in photography?
It is a working method from National Geographic photographer Paul Nicklen: spend the first 20% of a shoot getting safe, sharp, correctly exposed images, 60% pushing for your best creative work, and the final 20% experimenting (Digital Camera World). On a listing shoot, that means nailing the MLS shot list first, then spending time on the hero images, then trying the ambitious angle.
What are 7 basic tips for taking good photographs?
- Use good light, and avoid harsh direct sun.
- Keep the camera steady with a tripod.
- Keep horizons and verticals straight.
- Compose with the grid and the rule of thirds.
- Remove distractions from the frame.
- Expose for the highlights and bracket when light is uneven.
- Edit lightly and consistently.
What apps do realtors use for pictures?
Most agents use the built-in camera app (with the grid and ProRAW on supported iPhones), Adobe Lightroom mobile or Snapseed for editing, and their MLS or listing app to upload. Skip heavy filters; they make rooms look unnatural.
How much does it cost to have real estate photos taken?
A standard package typically costs about $200, and most fall between $150 and $300, according to PropPhoto's August 2026 data. Drone, video, twilight and floor plans are usually priced as add-ons.
Is there good money in real estate photography?
It can be a steady real estate photography business, but it is volume work. The U.S. Bureau of Labor Statistics reports a median pay of $42,520 for photographers overall (May 2024). Income in the real estate niche depends on shoots per week and add-ons like drone, video and floor plans.
What qualifications do I need to be a real estate photographer?
In the U.S. there is generally no license required to photograph homes. A strong portfolio, reliable gear, insurance and fast turnaround matter more. Flying a drone for paid work requires an FAA Part 107 remote pilot certificate.
What is the 3-3-3 rule in real estate?
It isn't a photography rule. It is an informal buyer guideline, and definitions vary. A common version says to keep three months of living expenses saved, keep three months of mortgage payments in reserve, and compare at least three similar homes before making an offer.
Is an iPhone good enough for real estate photos?
For many listings, yes, if you use a tripod, shoot at chest height, keep verticals straight and control the light. For luxury homes or rooms with extreme contrast, a professional real estate photographer will get cleaner results.
Get your listing photos market-ready
Great photos come from preparation and discipline more than equipment, and strong photography is one of the cheapest advantages a listing can have. Use these real estate photography tips on your next shoot. Work the shot list, keep your verticals straight, and shoot every room in its best light. When a room is empty or a shot needs more than a quick edit, Bella can help: virtual staging from $37 a photo and photo editing from $5, both finished by real designers.